Best Way to Use Bollards for Safer Loading Zones
Loading zones can be hectic. You've got trucks pulling in, workers on foot, trolleys moving goods, and cars trying to squeeze past. With so much activity, it's easy for things to get out of hand or for someone to end up in the wrong spot. That’s where bollards come into play. They’re simple, tough posts, but when used the right way, bollards help keep people, vehicles, and equipment where they belong.
They give clear guidance and stop things from going wrong, especially in fast-moving areas like warehouses or delivery docks. Planning where to put bollards and how to space them makes all the difference. It’s not just about putting posts in the ground. It’s about shaping a space so it’s safer and easier to use day after day.
Why Loading Zones Need Physical Barriers
When we talk about loading zones, we’re really talking about shared ground. Delivery drivers, forklifts, warehouse crew, and pedestrians often move through the same area. Without clear separation, it’s hard to know who has right of way or worse, people just take their chances.
Visual line markings help set the stage, but they’re easy to ignore when things get busy. A painted boundary can fade or be crossed without anyone noticing. That becomes risky, especially in tight zones where visibility is limited. Bollards bring in a physical barrier that can’t be overlooked or pushed past.
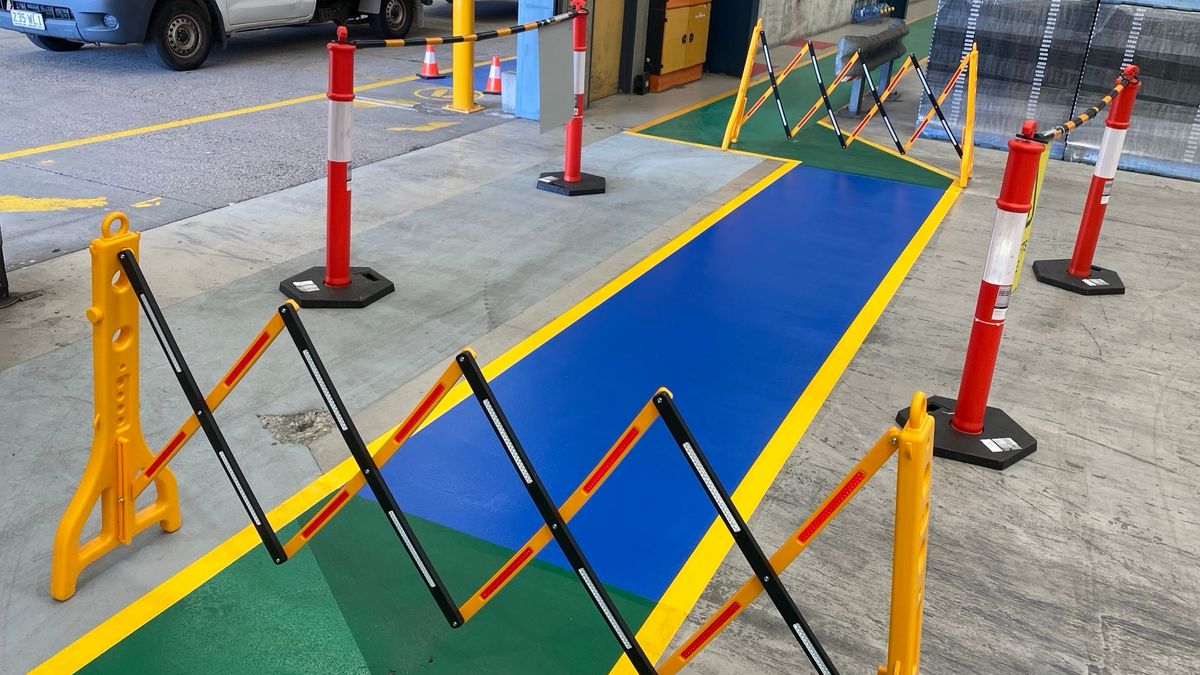
They’re strong, steady, and send a clear message about where vehicles should and shouldn’t go. In a cramped delivery bay, for example, one well-placed bollard can stop a truck from clipping the edge of a walkway. In another area, a row of bollards between car parking and footpaths helps keep children safely out of the way when parents are loading up the boot.
By creating these physical zones, we reduce the chance of mix-ups. Bollards tell people exactly how far they can go, whether they’re driving or just walking by. That clarity keeps the space moving.
Choosing the Right Bollards for the Job
Not all bollards are the same. What works in a small car park might not suit a busy transport hub, so picking the right one starts with how the space is used. Fixed bollards are solid and stay in one spot. For areas where no vehicles should ever pass, these are your best pick. They give lasting control and don’t move even under pressure.
If you need flexibility, removable bollards come into play. These are good for loading zones that need temporary access, such as letting delivery trucks in during certain hours but blocking the path at other times. Then there are flexible or spring-back bollards. These don’t offer hard stops but do provide visual separation in spots where some give is needed. Think of areas where vehicles might pull in tight but you still want a clear barrier for guidance.
The type of surface they’re mounted on matters too. Bitumen handles heat differently than concrete, especially in parts of Queensland where summer sun can be harsh. A poorly matched bollard might lift, crack, or tilt if installed without the right fixings.
Choosing the correct anchoring system is key. In Queensland’s commercial and warehouse environments, Angle Linemarking uses industrial-grade fixings and materials suited for both bitumen and concrete, making sure bollards stay upright and stable in all weather.
Where to Place Bollards for Maximum Safety
Putting bollards in the right spots matters just as much as having them. Good placement starts with knowing how people move and how vehicles need to flow. Entry and exit points are an easy first step. If those get blocked or overcrowded, the whole loading zone stops working.
Corners and sharp turns are worth special attention. Trucks moving in reverse or turning at tight angles need help knowing where to stop. A well-placed bollard can avoid scrapes and, better yet, protect nearby workers or gear.
Pinch points happen in nearly every site. These are the narrow spots where everyone seems to pass through. Here, bollards act like gentle traffic directors. They don’t just stop accidents, they guide movement so trucks go one way and people have room on the other.
If line marking is already in place, bollards should work with it, not against it. They can help highlight loading zone outlines, point out arrows for one-way driving, or mark off no-standing areas. Using them together makes it clear how the space should be used and helps new users follow the rules without any confusion.
Why Maintenance and Installation Planning Matters
A loading zone only works if the gear in it holds up. That includes bollards. Once they’re installed, they should stay strong and straight, but only if the prep is done right. Rushed installs early in the wet or hot months risk poor bonding. Moisture in the surface or heat-flawed adhesives can cause a lean or full shift later.
Spacing is often overlooked. If posts are too tight, vehicles can't pass where they should. If too wide, people start walking through gaps that should be blocked. Bollards need to be close enough to form a proper barrier, while leaving room for trolleys or emergency access. Mounting matters too.
A loose or wobbly post won’t help anyone. Using secure fixings tailored to the surface below makes a big difference, and Angle Linemarking offers ongoing maintenance as part of its service, helping with seasonal checks or repairs before peak periods.
Peak season can push every part of a loading zone to the limit. That's why spring, leading into Queensland's busiest time, is the right window for fixing faded paint, checking bollard mounts, and making any repairs before rush hits. Planning now heads off emergencies when the space is packed.
Building Safer, Smarter Spaces Before Summer Hits
Bollards do simple work, but the impact they have is anything but small. They divide space, direct movement, and help stop accidents before they start. In loading zones, where every bit of space gets used over and over, that kind of structure makes the whole area run better.
With summer coming and Queensland's peak transport months around the corner, now is the time to check layouts, sort maintenance, and design better, safer spaces. A solid setup with the right bollards lowers risk, keeps people moving, and helps everyone get on with their work, knowing the layout is safe and dependable.
At Angle Linemarking, we know how important it is to create spaces that work smoothly and safely every day. Whether you're managing a warehouse, delivery zone or shared car park, the right layout can make all the difference.
Thoughtful planning with visible markings and properly placed bollards helps people move with confidence and keeps things operating without unnecessary stress. We're here to help make those improvements practical and straightforward—contact us to start planning your setup.